
In other posts, I have installed SabNZBD, Sickbeard, and Couchpotato for auto downloading of TV and Movies. In this case, I wanted to use the same process to download Comic Book Files, CBRs, automatically based on created lists, have SABnzbd download them, and have them moved to a permanent folder for viewing access.
Mylar is a great solution. It’s an open-source project maintained by evilhero and works very well and is still under active development.
Before you start, make sure you have a working SABnzbd install on the Host.
Let’s get the pre-reqs out of the way also:
sudo apt-get install git-core
Download the latest copy of Mylar. I like using the /opt directory for full contained applications. Mylar is still in active development so I opt to have the latest development branch downloaded via git.
cd /opt
git clone https://github.com/evilhero/mylar.git -b development
To have Mylar start automatically, copy out the /opt/mylar/mylar.init.d file to /etc/init.d, make it executable, and add it to auto start.
sudo cp /opt/mylar/init-scripts/ubuntu.init.d /etc/init.d/mylar
sudo chmod +x /etc/init.d/mylar
sudo update-rc.d mylar defaults
Create the user account for mylar to use and optionally add it to a user group.
## Create the system only mylar user
sudo adduser --system --no-create-home mylar

## If you use my tutorials, add mylar to the nabd group so it can access the common Downloads folder.   Otherwise, you don't need this.
sudo usermod -g nzbd mylar
Change the owner of the /opt/mylar directory to the newly created ‘mylar’ user
chown -R mylar:root /opt/mylar
Now create/edit the /etc/default/mylar file and add the following items:
# path to app
APP_PATH=/opt/mylar
# user
RUN_AS=mylar
Start the service
/etc/init.d/mylar start
Mylar should now be available from that host on port 8090 using http://SERVERNAME:8090 The web interface should load and provide you with additional config options.
Now I want to get mylar to work with SABnzbd.
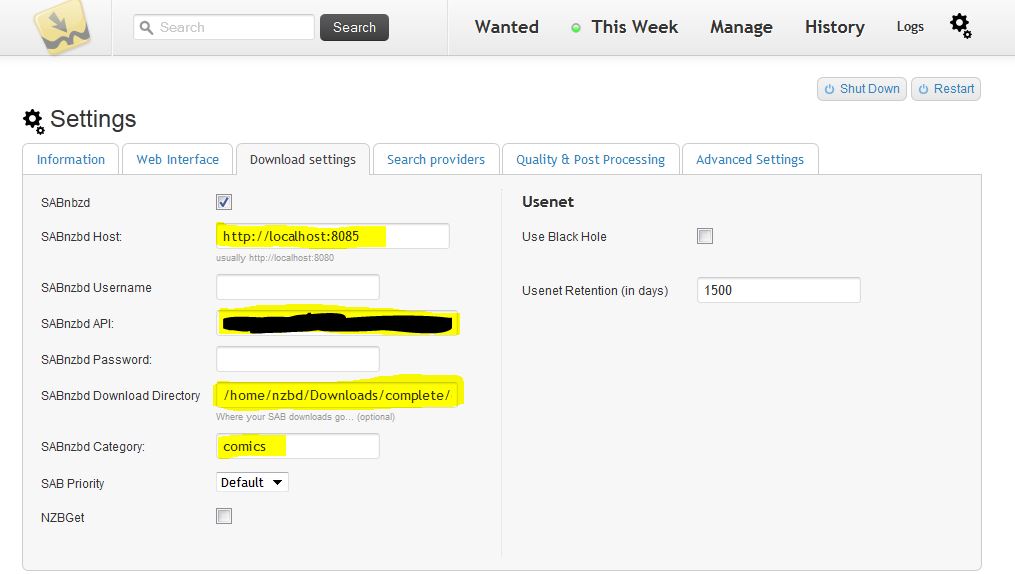
Bring up mylar web interface and click on Settings in the upper right and then click on the Download Settings tab. Fill in the information for your SABnzbd host. Note that in the API field, I used the NZB API from SABnzbd. Mylar doesn’t need full control over SAB, it only needs to add NZBs to SAB. Fill in the fields with the values for your system. If you have been using my examples, the image below should match the values you would use.
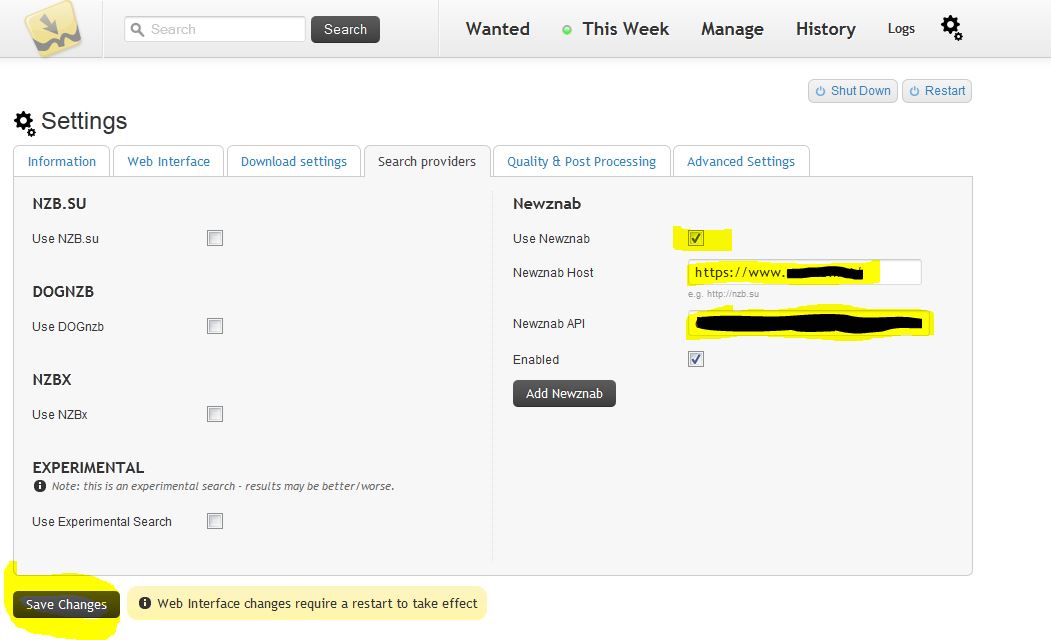
Last thing to do in order to get the basics up and running is to add a search provider. Here I use a custom NZB indexer. Click on upper right, for settings, select the search providers tab, check the box for Use Newznab, and fill in your indexer’s details. Be sure to save your changes.
Now lets get the Post-processing scripts ready. Locate the scripts in /opt/mylar/sabnzbd. Copy the 1 file to the directory you have configured in SAB to hold the processing scripts, I prefer to use a softlink instead of copying the file for easier upgrades.
ln -s /opt/mylar/post-processing/sabnzbd/ComicRN.py /opt/sabprocessingscripts/ComicRN.py
In SAB, you will want to add a new category for the mylar downloads. I choose the category ‘comics’ but you can call it whatever you want, just so long as the mylar download category matches exactly.
![]()
With that, you should have a basic, working Mylar installed.
Troubleshooting Permissions
If you encounter problems with the creation, copying, renaming of any files, check your mylar account permissions. In this example, I added mylar to a group called nzbd. When Mylar creates new sub-directories for content, the Linux default is to create the directory with permissions of 0755 meaning that the group nzbd does not have write permissions. You can solve this issue in many ways.
Make sure that you have both Mylar and SABNzbd configured to create directories with permissions of 777 and 0777 respectively.
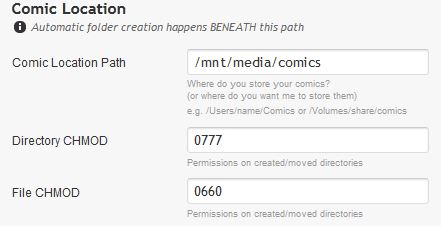
Mylar Permissions
![]()
To make life easy, if you already have an nzbd user for SABnzbd to use, you can just run mylar under the nzbd account instead of creating a mylar account. This way mylar and SABNzbd are both running with the same user permissions. If you do this, you’ll want to use ‘chown -R nzbd:nzbd /opt/mylar’ and change the RUN_AS user from mylar to nzbd.
For the security conscious, you can implement ACLs in linux to handle the permissions on directories. This requires the installation and configuration of an ACL utility on your system.

When I start the service, I get the following error:
/etc/init.d/mylar: 44: [: =d: unexpected operator
Any ideas? Need further info?
init.d/mylar works just fine on mine system. Did you change the init.d/mylar file at all? You can paste lines 40-50 here and I can compare it to my working script if you like.
I should also mention that the servics starts.